
|
|
|
|
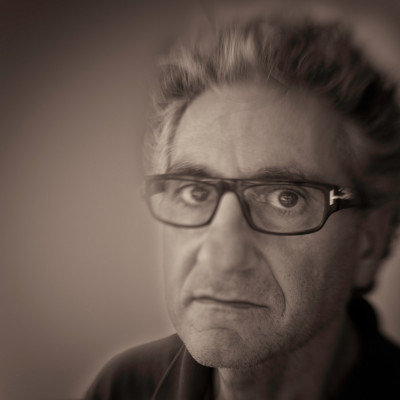
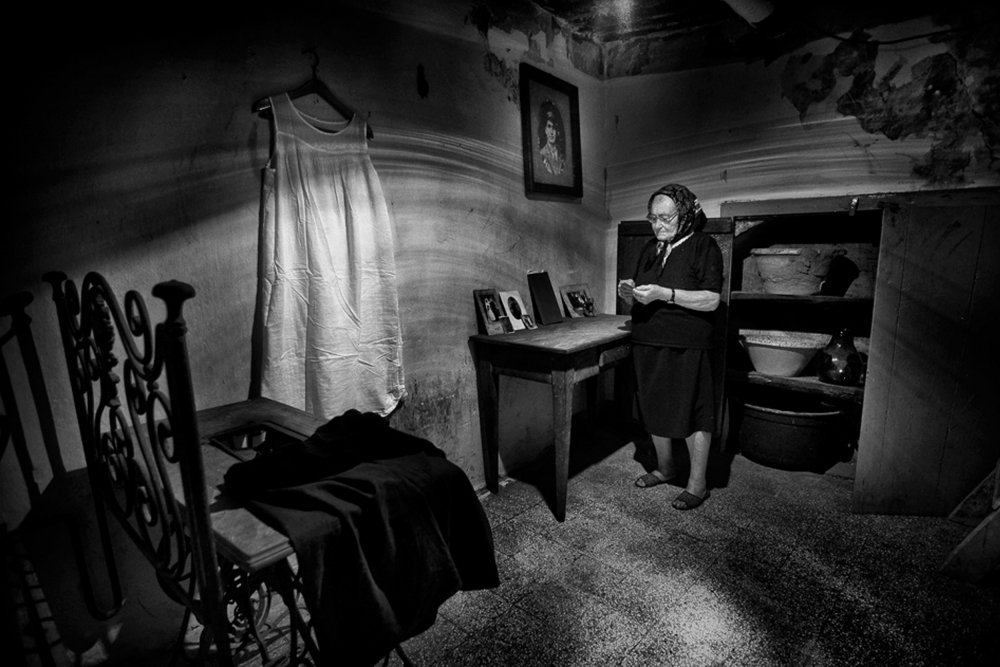 Nikon D300, Tokina 12-24mm f/4 @12mm, 1/20s, f/4, ISO2000
This photo has been taken at an event in the village of Mandia Ascea, Italy, called 'The feast of ancient flavours'.
I did see the old lady in a room, surrounded by the furniture and various antique objects, giving me the feeling of going back in time.
I asked the lady 'Elisabetta' to pose for me, looking at one of the old photos on the table, and she was happy to be photographed. I made a sequence of three hand held shots, what I usually do for this kind of 'in-the-moment' captures. I only used ambient light (no flash) to have a more natural light environment.
The purpose of this image was to recall the memories of the past and of the living situations in those days. I converted the image into black and white, since I felt that it would make my message stronger. I got many very positive reactions, convincing me that my image apparently conveyed that same feeling to the viewers .
Editing
1) I optimized white and black point setting in Camera RAW in the basic settings tab.
2) The image was then opened in Photoshop and I made a copy of the background layer.
3) I opened an 'H/S adjustment layer' and desaturated the image comopletely to make it black and white.
4) I opened a 'Level adjustment layer' and optimized the levels in the dark areas.
5) I made a 'Level adjustment layer' and optimized the levels in the bright areas.
6) I put the 'black levels' layer on top of the layer stack.
7) I activated the layer mask of it and paint on it with a soft brush to reveal the bright areas of the underlying layer.
8) All layers were merged and I did a final levels adjustment.
9) The image was sharpened and resized for web in two steps: First an 'Unsharp mask' was applied (amount 100/radius 0.6) and an image reduction to 50 %. A second sharpening (amount 60/radius 0.4) and a final downsizing to the required web size finished the process.
Hints
1) Shoot in RAW mode. It gives you much more possibilities and flexibility in the processing steps afterwards.
2) Take care about your composition and include as many elements as needed (but not more) to reinforce the message of your image
3) Make for this kind of images a sequence of shots (at least three) in order to be sure to get the the 'top' one.
Biography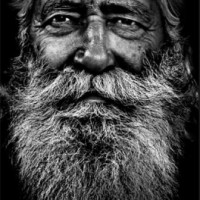
I am 45 years old and living now for almost 20 years in Rome, where I work in the military administration. Photography is a hobby and a passion, allowing me to observe the world around us and the changes during the years.
 | Write |
 | Raffaele Vallone Complimenti Antonio per lo scatto e grazie per la voglia di condividere con tutti noi i "segreti" della tua arte, un caro saluto, raff |
 | Yvette Depaepe CREW Thanks Antonio !!! Great tutorial, clear language and most valuable tips ...
Wonderful result, fine and excellent image ! |
 | Usef Bagheri Very usefull tips thank you so much for sharing, good luck and keep giong |
 | Edoardo Gobattoni Complimenti Antonio x il bel tutorial e l'ottimo scatto. Un salutone !!! Ciao ;) |
 | Meike Hofstetter Wonderful story telling shot. Thank you for sharing your tutorial, it is great to see the story "behind the scenes". |
 | Vito Guarino PRO Grazie per la condivisione di questo interessante tutorial, Antonio. Ciao. Vito |
 | Ben Rea great write-up! thank you for sharing your work and insight, Antonio :) beautiful image. |