
|
|
|
|
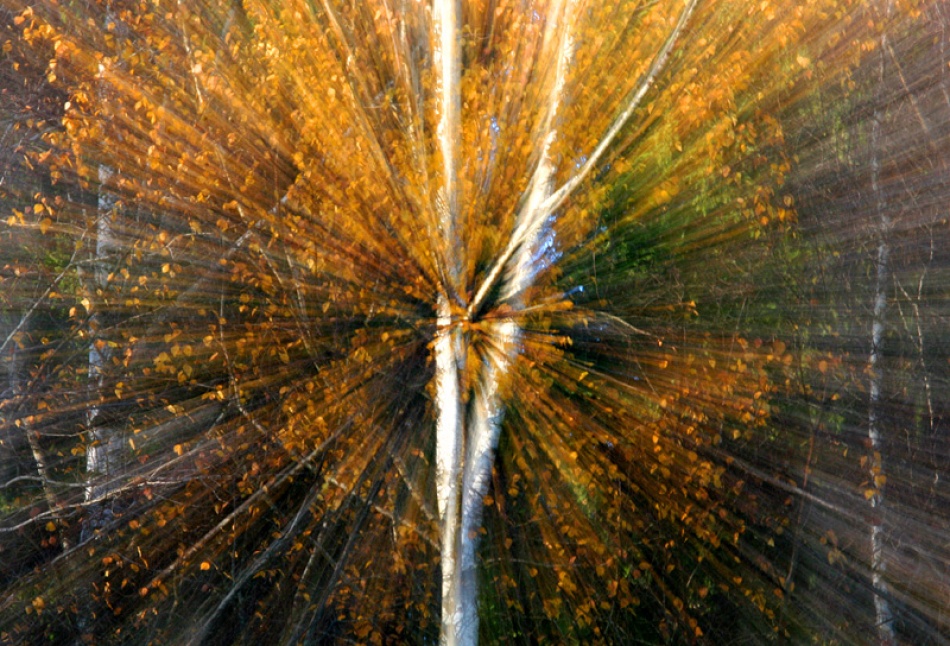
Zoom © Bror Johansson
Today I’m going to let you in on a couple secrets.
First, and with the help of five very skilled photographers, I’ll show you how to put some artistic spin on your photos by using the zoom blur effect while you’re shooting. It’s a great technique to try, especially if you’re feeling a bit uninspired shooting in the same ol’ place and you want to give your photos a new, creative twist.
So pay close attention to everything these talented folks have to tell you — soon you’ll be very glad you did.
Which brings me to my second secret: In two weeks, the 1x Weekly Theme will be Zoom Blur.
The idea behind zoom blur is to create a sense of motion by zooming in or out during a slow shutter speed, resulting in an image with a central subject and lines radiating outward, as if the subject is moving.
Here are a few essentials to keep in mind.
Ok. Those are the basic ingredients for producing a zoom blur photo. Now let’s get more specific and see how the zoom blur pros do it.
Phyllis Clarke has been using this technique for years and has truly mastered it. To make The Arrival, she intentionally went to a location in the woods where the light was low but filtering through the trees, just before sunset. She positioned her subject in the middle of the frame, focused on him, and using a Nikkor DX 18–200mm lens, she chose to use a partial zoom, meaning she did not zoom all the way to 200mm. She started with a short focal length (18mm) and then zoomed in to 90mm during a 1-second exposure.
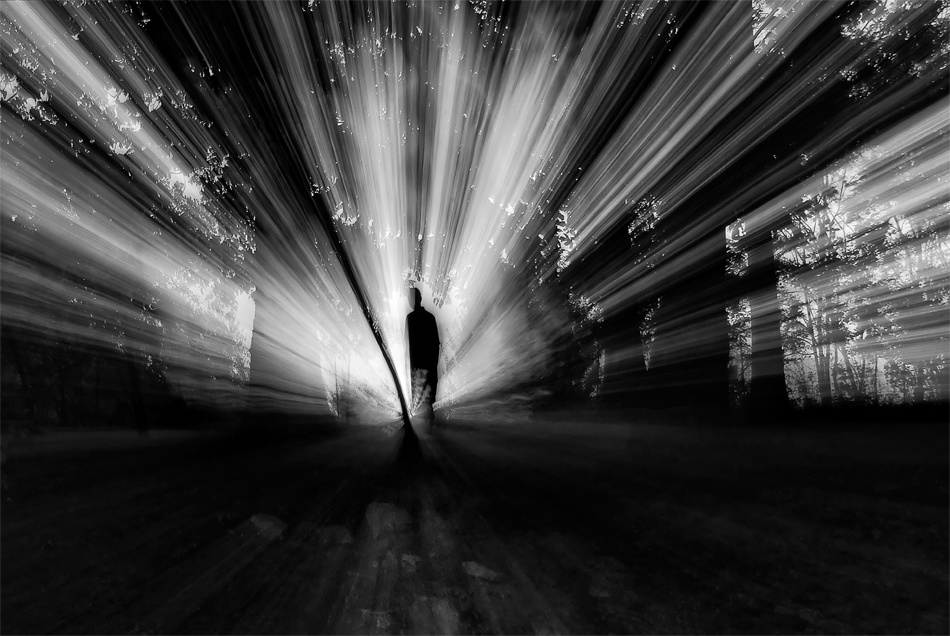
The Arrival © Phyllis Clarke
Nikon D200 Nikkor DX 18–200mm 1 sec f/3.2 ISO 100 Tripod Zoom Blur: 18mm to 90mm
Because Phyllis is more experienced with zoom blur than a lot of us, she knows many tricks to create the best images. For instance, on many occasions she uses what she calls a “full zoom” — zooming in and then zooming out before the shutter closes. This requires a longer shutter speed than one second, though, and that’s why she didn’t use her full zoom technique here. Phyllis says, “When you do a full zoom (in and out), then you get all the lines on the top and bottom of the frame. The zoom blur is not one I often do alone because it does not give you very interesting effects; you get the pretty standard stuff. But if you use the full zoom, it creates designs and not just the zooming effect.”
Still, this image is out of this world. Check out the color version too. It’s hard to choose a favorite, isn’t it.
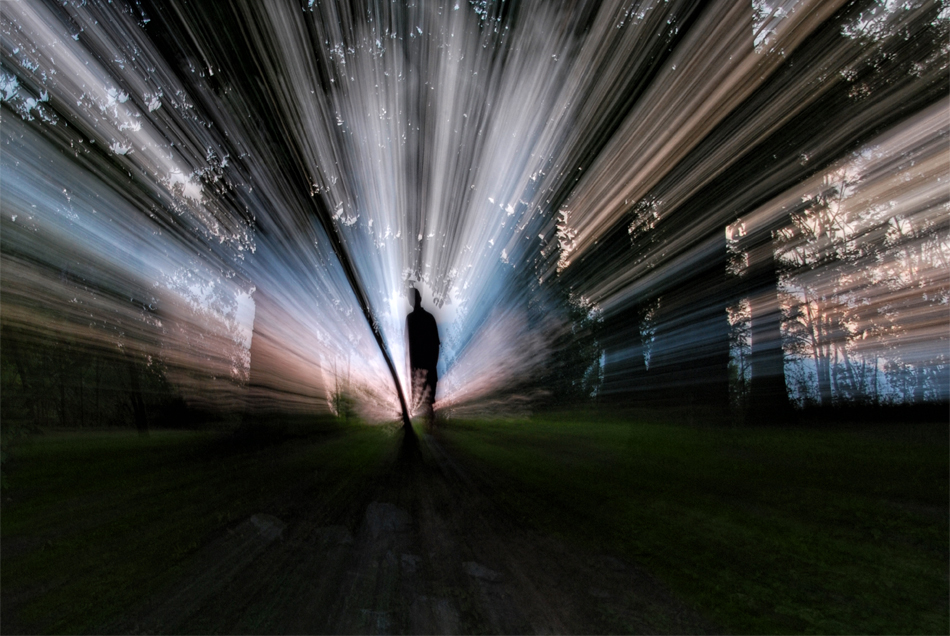
The Arrival © Phyllis Clarke
Nikon D200 Nikkor DX 18–200mm 1 sec f/3.2 ISO 100 Tripod Zoom Blur: 18mm to 90mm
Samanta was “so excited and chasing trams like crazy” in Zurich, Switzerland, when she made Crazy Driver. Her plan at first was to capture the faces of the passengers through the tram windows, but she was having little success. This was a spontaneous shot (she thinks fast on her feet!), and she had to move quickly because the tram was rapidly approaching.
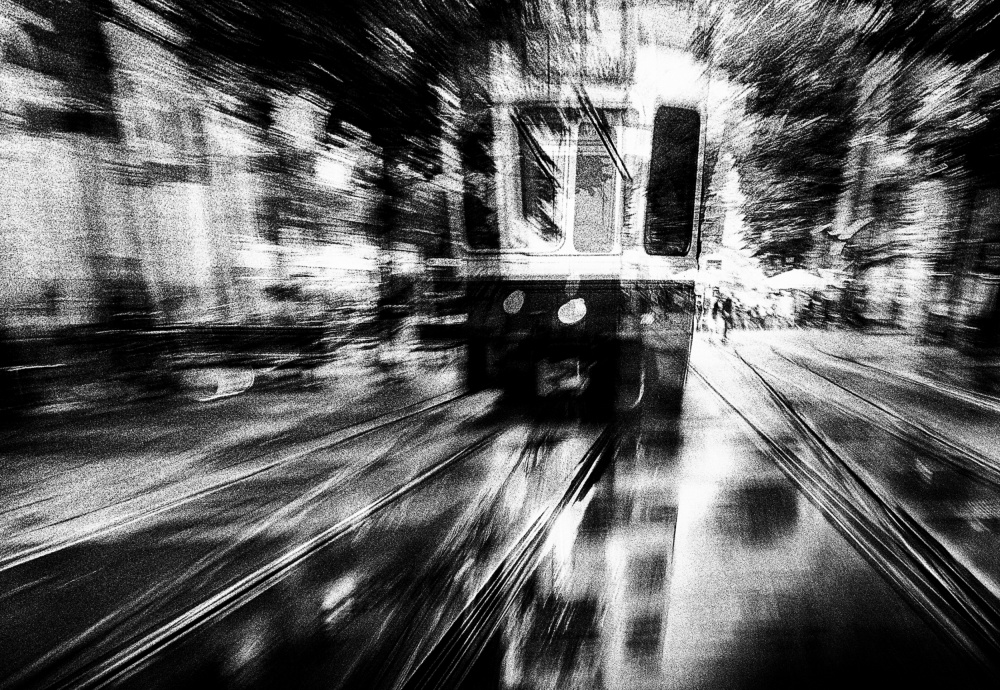
Crazy Driver © Samanta
Nikon D5000 Nikkor 18–105mm 1/40 sec f/11 ISO 250 Zoom Blur: 105mm to 45mm
She positioned herself between the rails and got down on her knees. Handholding the camera, she used the reverse zoom blur technique, meaning she started with her lens fully zoomed in, focused on the tram, and then zoomed out from the scene. Using a Nikkor 18–105mm lens, she did a partial zoom, moving from 105mm to 45mm during a 1/40-second exposure. “Using the zoom blur effect with the right subject and creativity, you can make interesting, dynamic and artistic photos,” she says. It’s such a refreshing, super-original approach to street photography too.
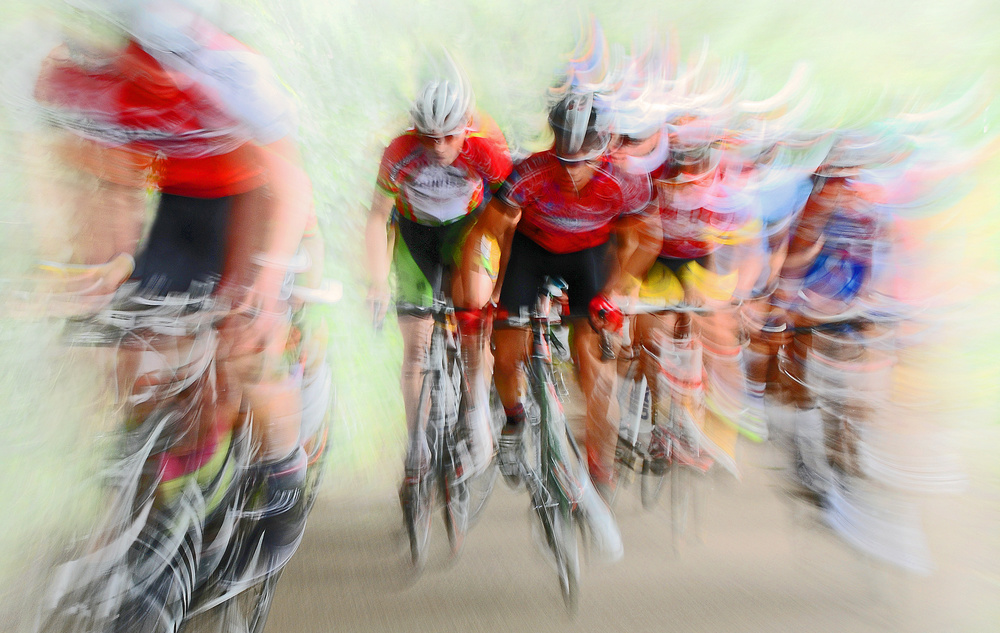
Lou Urlings cleverly and brilliantly used zoom blur while photographing cycling races with a short zoom lens — the Nikkor DX 16–85mm. After some post-processing, his images look more like Impressionistic watercolors than photographs.
“Normally,” he says, “I prefer to use the reverse zoom blur, manually focus (no autofocus) on the point where I intend to start the zooming and then zoom out very quickly. Because of the speed of the racing cyclists, and also depending on my own position, I have to simultaneously make a sideways panning movement with the camera. The camera is of course set on S (shutter priority mode), mostly between 1/10 and 1/20 second shutter speed. In one image I didn't use flash (Taking the Lead), but for the others I did. And a tripod would give a different result (no "waves"), so I don't use it when I make these kinds of pictures.”
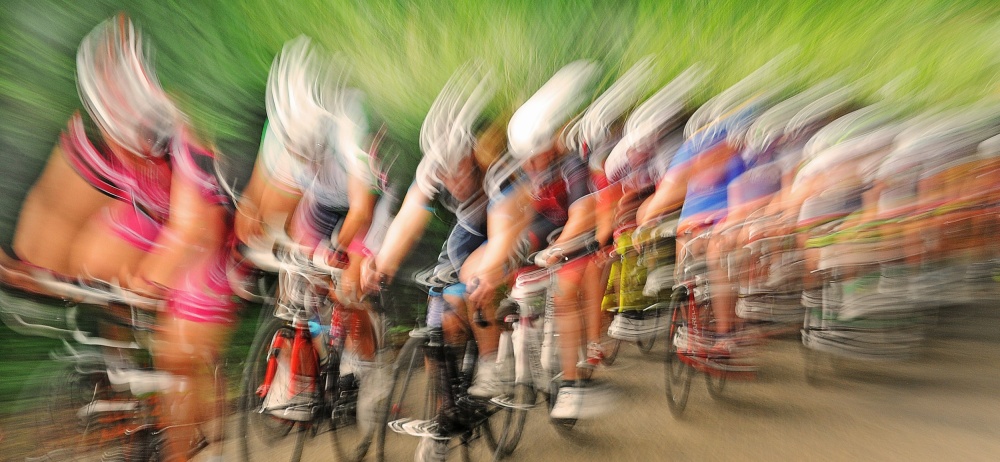
Speedwaves © Lou Urlings
Nikon D300 Nikkor DX 16–85mm 1/13 sec f/9 EV – 0.3 ISO 200 Flash Zoom Blur: 85mm to 78mm
Lou has some excellent tips and advice for us too:
1) Great races or a Tour de France-type setting are hardly interesting for this kind of photography. You will see the riders only once, and there is a big chance that your view will be disturbed. Look for an amateur race where the riders frequently pass by. That will give you a lot of opportunities to shoot and the possibility to adjust the camera settings, if necessary.
2) On bright days it is often impossible to get the shutter speed you need without using a grey filter. A covered (cloudy) sky is perfect, especially when you want to use flash.
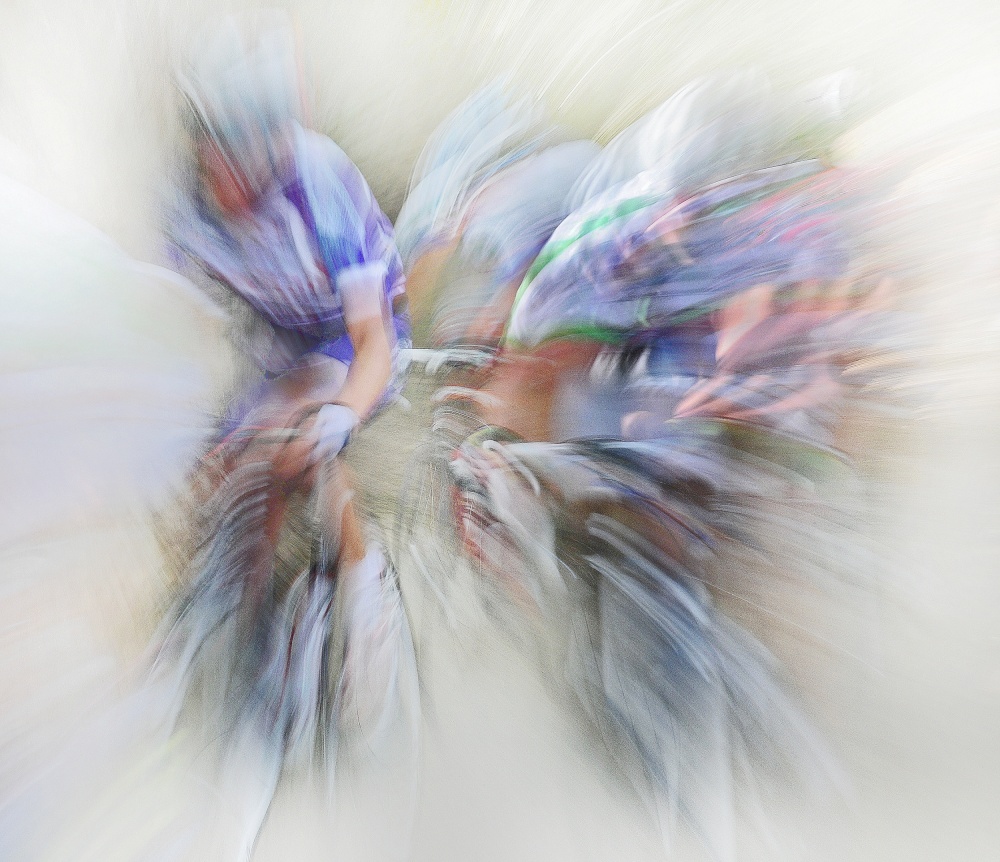
Ultimo Giro #2 © Lou Urlings
Nikon D300 Nikkor DX 16–85mm 1/15 sec f/11 EV – 0.3 ISO 200 Flash Zoom Blur: 85mm to 70mm
3) Your background should be as clean as possible. Pay attention to it when you are looking for a good position. Try to avoid too much contrast or distracting elements.
4) Keep trying: Not every shot can be a hit. You must realize that it's hard to control the exact result of the zooming act.
Taking the Lead © Lou Urlings
Nikon D300 Nikkor DX 16–85mm 1/13 sec f/7.1 EV +1.0 ISO 200 No Flash Zoom Blur: 85mm to 38mm
Ulf Börjesson’s Dusk is a prime example of a full reverse zoom, meaning he started at the longest focal length (completely zoomed in) and slowly twisted the zoom ring to the shortest focal length (completely zoomed out). He made this gorgeous landscape at twilight in Skogskyrkogården, a cemetery near Stockholm, Sweden, hoping to create a unique image of a very well-known location for photographers. Using a Nikkor 24–70 lens, he reverse zoomed from 70mm to 24mm, steadily and constantly for 30 seconds, and produced this beautiful gem.
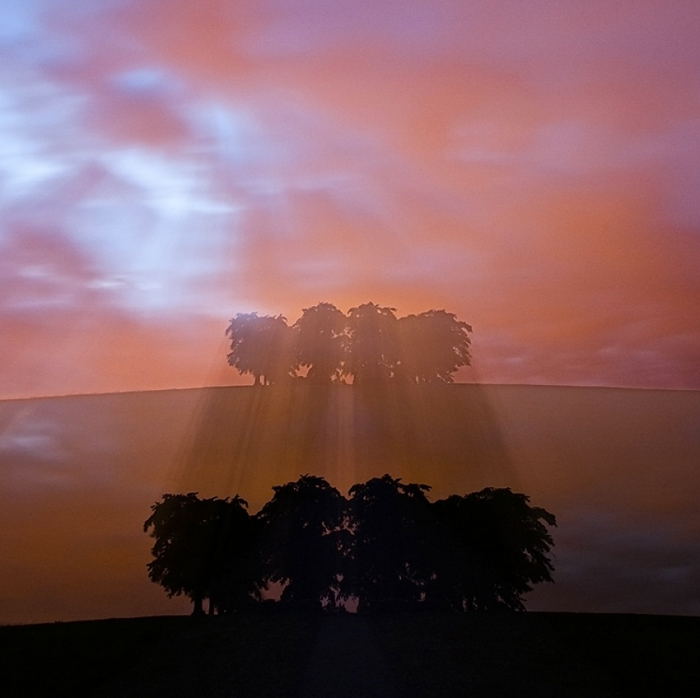
Dusk © Ulf H Börjesson
Nikon D3 Nikkor 24–70mm f/2.8 30 sec f/2.8 ISO 200 Tripod Zoom Blur: 70mm to 24mm
This too is a very different take on a popular photographers’ destination – La Défense in Paris. Charly Lataste made this spectacular image, Tunnel Effect, on a walkway covered with glass between two buildings. He specifically chose to use the zoom blur effect to play with the lights of the building in the background.
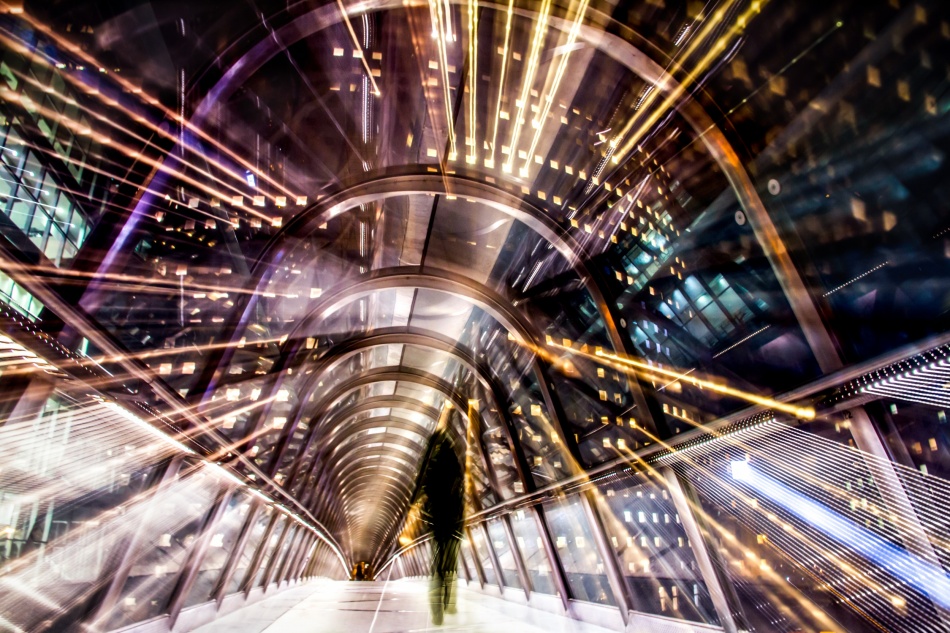
Tunnel Effect © Charly Lataste
Canon 7D 15–85mm lens 2 sec f/5.6 ISO 400 Tripod Zoom Blur: 50mm to 15mm
With a 15–85mm lens, he used a reverse zoom blur, starting at a focal length of 50mm and ending at a 15mm focal length during a 2-second exposure. He folded up a tripod to be as close to the floor as possible. This braced the camera and allowed him to capture straight, streaming lines from the lights.
You must be very fluid in your movement when you twist the zoom ring. To ensure that the lines remain as straight as possible, you can start zooming just before you open the shutter and continue to evenly zoom for the duration of the exposure time, passing through the targeted ending focal length just as the shutter closes. “Otherwise,” Charly says, “the information collected at the focal length where you stop zooming will erase the information collected during the zooming.
”
Charly has two other stellar tips for you.
1) Look for brilliant light sources because they create excellent rays of light in a zoom blur image.
2) And be sure to add someone to the composition, if at all possible, so there is a central figure from which the rays of light can emanate.
So there you have it — the zoom blur effect, demystified by some fantastic photographers. Ready to get started on your own zoom blurs? You’ve got two weeks to knock our socks off in the upcoming Weekly Theme, and I’m really looking forward to seeing what you come up with.
Good luck everyone!
Update: I just have to show you one more by FrankBa. The Eiffel Tower is always illuminated with yellow lights, but at the top of every hour, it sparkles with the addition of white lights. Frank intentionally wanted to show these white lights around the tower, and he knew that a zoom blur would help achieve this.
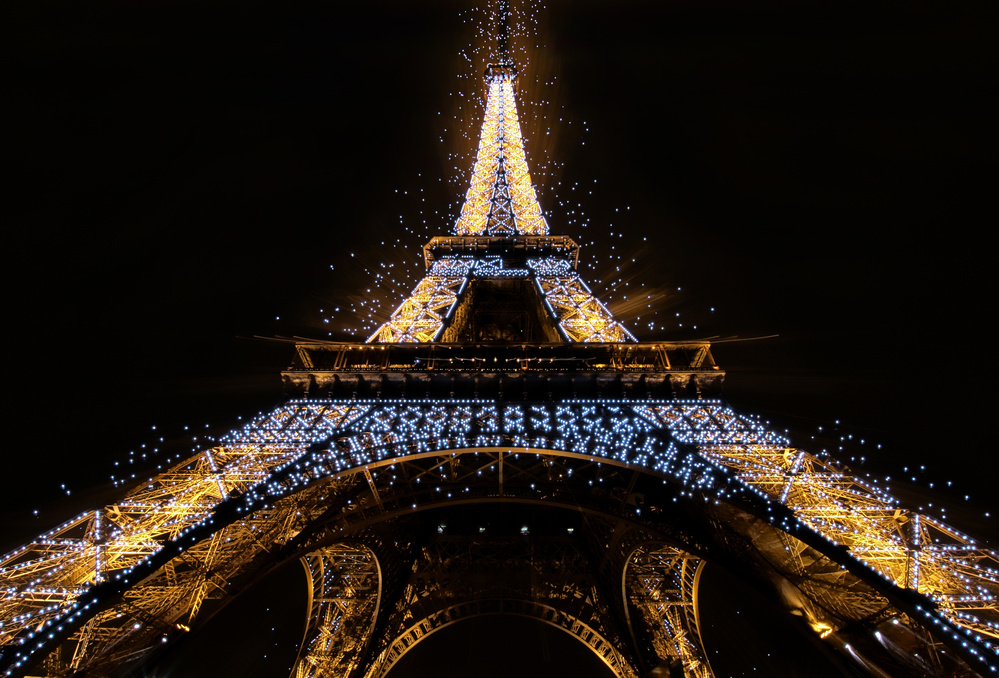
Champagne!!! © FrankBa
Nikon D300 Nikkor AF-S 10–24mm 8 sec f/18 ISO 200 Tripod Zoom Blur: 10mm to almost 24mm
Using a Nikkor AF-S 10–24mm lens, his first zoom blur attempt was with a wide aperture and a fast shutter speed. But the Eiffel Tower and its yellow lights were showing up in the blur around the tower, and he wasn’t getting the effect he wanted. So, he reduced the aperture to f/18, opened the shutter for 6 seconds to expose for the tower, and then for 2 more seconds he used a partial zoom, moving fluidly from 10mm to almost 24mm until the shutter closed. Frank says he made sure to not stop zooming during those last two seconds; "otherwise, it would have brought back the yellow lights of the tower."
Voilà! Bubbly Champagne!!! How cool is that!
 | Write |
 | sotu These are fantastic. Thanks for sharing! |
 | marianna Hi, Mandy, good tips, useful information to create photos, thanks for great photos to demonstrate it, Greetings! |
 | Mandy Schoch PRO So glad to hear that, mab. Hope to see one of yours in the Weekly Theme! |
 | Geoff Husa Great tips! I've always wanted to experiment with this more! |
| Mandy Schoch PRO I so look forward to seeing what you do with it, Geoff. You have about two weeks. Tick tock :) |
 | Thomas Brindt CREW Thank you very much, Mandy! It will indeed be very interesting to see the entries for Weekly theme. |
| Mandy Schoch PRO My pleasure, Thomas. Everyone quoted in this blog was so helpful. Many thanks again Charly, Ulf, Lou, Samanta and Phyllis! |
| Mandy Schoch PRO And thanks for the late addition, Frank! |