I live in Porto, Portugal, and my main hobby is photography. I love to shoot the architecture of my city with ultra-wide-angle lenses.
I go in search of places that I and many other people see regularly but do not fully appreciate.
I try to construct simple compositions without leaving the viewer indifferent. Many people do not recognize the messages that are conveyed by those who designed and built these structures.
 Canon 5D MarkIII . Samyang 14mm f/2.8 . f/8
"I was looking for interesting structures and angles in this neighborhood of simple geometric lines; the area is full of secrets that are revealed only to those who truly study the various constructions."
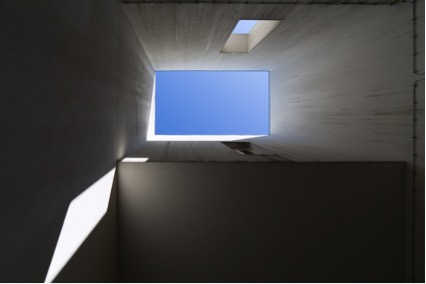
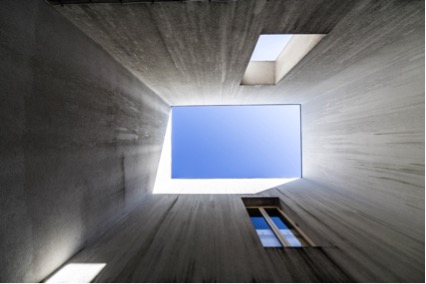
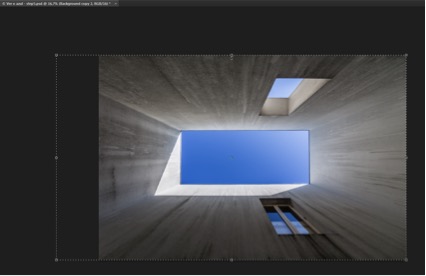
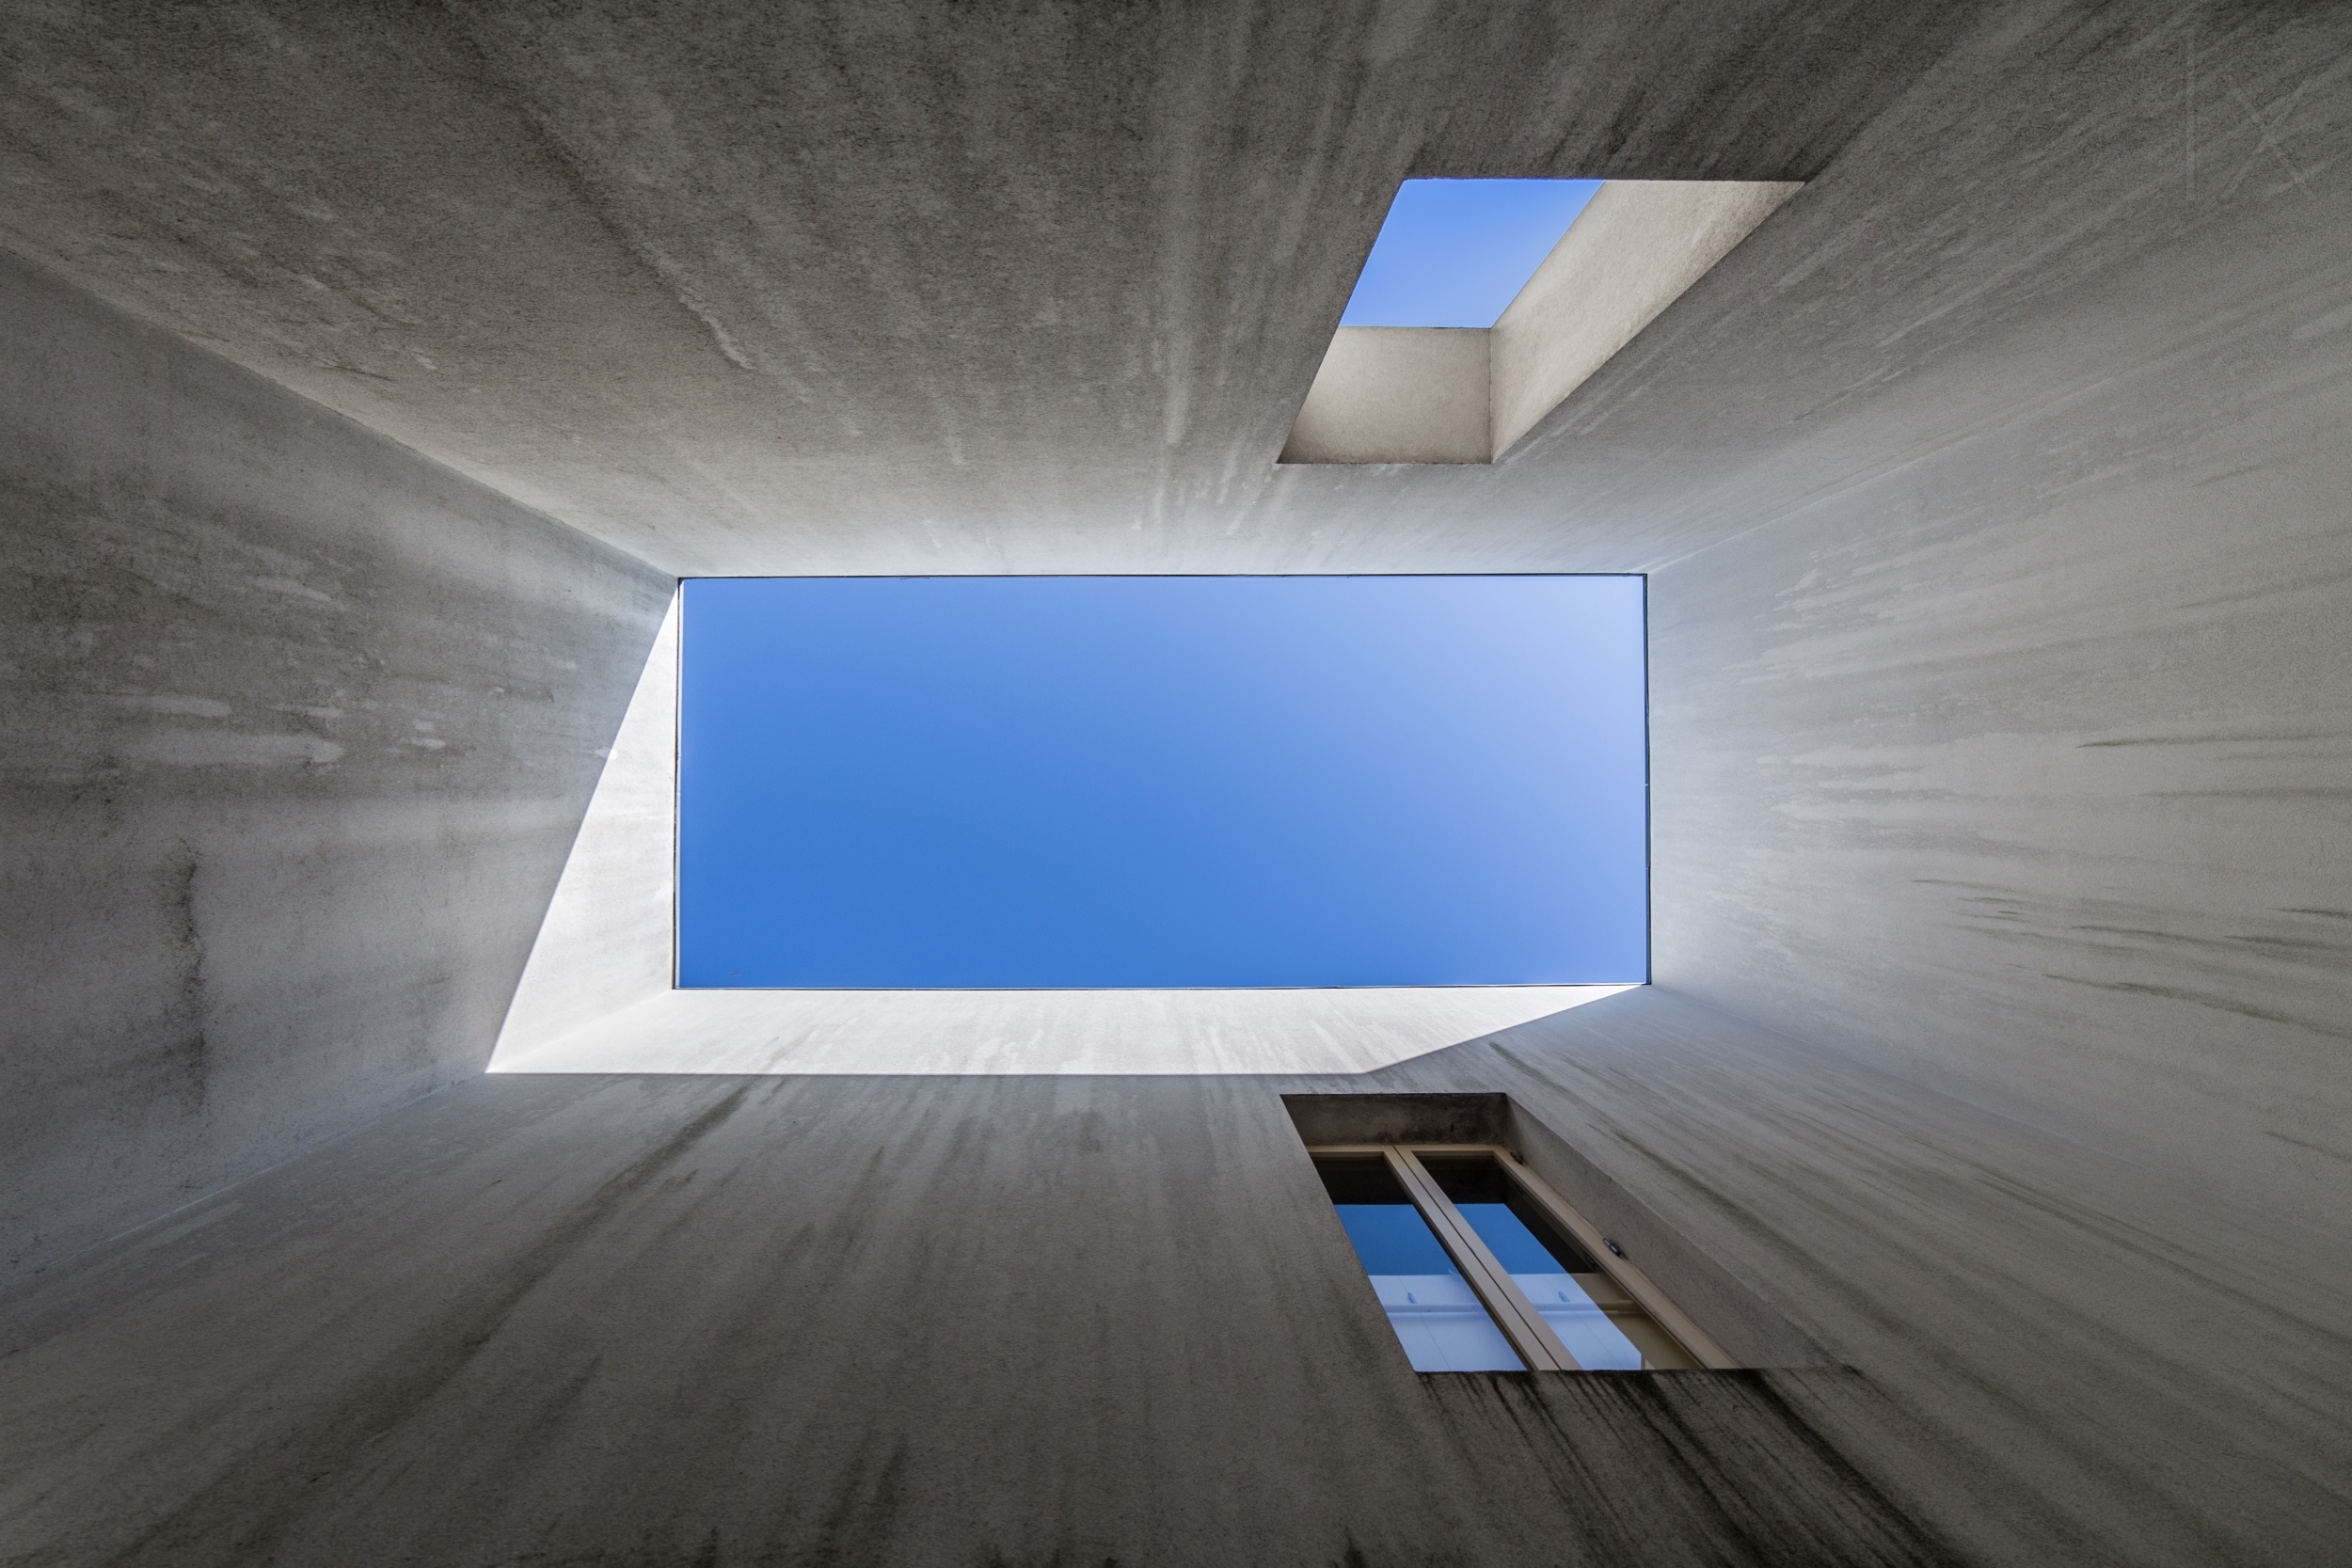
This image was taken on a Saturday morning. I had decided to explore the neighborhood of Bouça. This district was designed by architect Álvaro Siza Vieira in 1977 and completed in 2006. I was looking for interesting structures and angles in this neighborhood of simple geometric lines; the area is full of secrets that are revealed only to those who truly study the various constructions.
While climbing a set of stairs in an open passageway of an apartment complex, I spotted near the top a rectangular opening in the side wall across from the window of a dwelling. It was the same shape and size as the window. Whoever lived in that room would also have a view of the outdoors when looking out the window over the passageway.
"However, I wanted a more symmetrical composition, so I decided to use Photoshop CC to modify the view."
My position was limited by the placement of the stairs along the side wall, and I was unable to gain access to the center of the space without the help of a ladder. However, I wanted a more symmetrical composition, so I decided to use Photoshop CC to modify the view. I found that only in this way could the photo have impact.
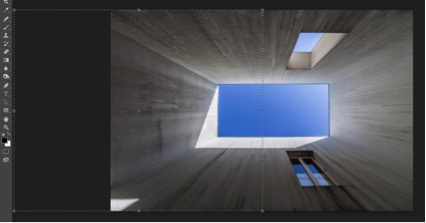
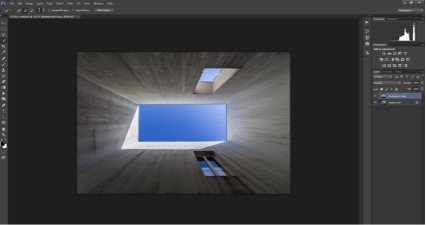
One of the views from the stairs is shown below. As you can see, I was unable to get to the center of the space.
The photographs were taken in RAW format. Since the image was static, to better control the light, I set the camera to Manual mode with ISO set to 100, the aperture to f/8 and the shutter speed to 1/125 second. I took several shots while changing the shutter speed to find the appropriate value of 1/125 second.
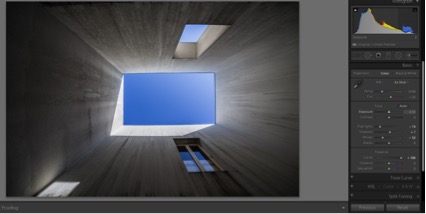
I started by importing the RAW files from the camera and changing the format from CR2 to DNG. I made a few adjustments to the image in Lightroom 5 and then exported it to Photoshop Creative Cloud 2014 to further transform the image through the use of layers.
This is the original DNG image.
1) In the Basic panel of the Develop module of Lightroom, I decreased the Whites and increased the Clarity.
2) In the Lens Corrections panel, I corrected the distortion caused by the lens by selecting Enable Profile Corrections.
3) Also in the Lens Corrections panel, in the Upright options I selected the Full option, which corrects both the vertical and horizontal distortions. It is the best option to correct the most extreme distortions.
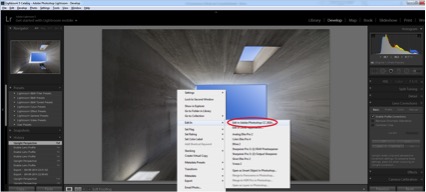
4) I exported the image to Photoshop CC to make further adjustments.
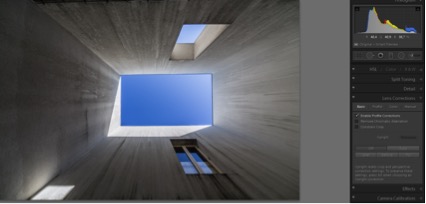
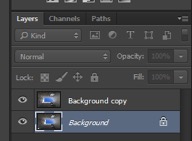
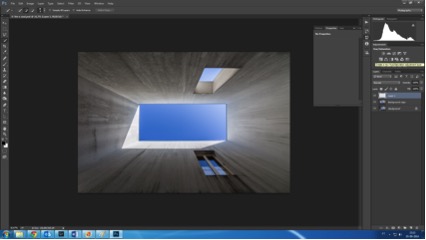
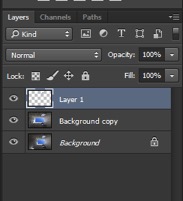
5) I first created a background layer copy in order to transform the picture.
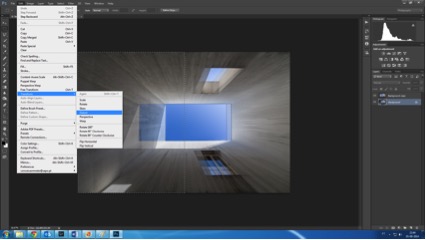
6) I selected the Transform > Distort tool and began to distort the left half of the image.
7) To achieve perfect symmetry, I had to use the Transform Distort tool on the entire image so that it aligned with the corners of the walls.
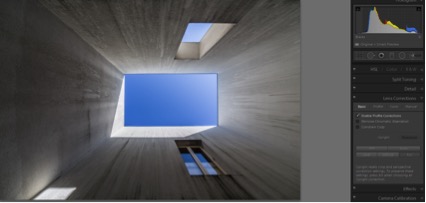
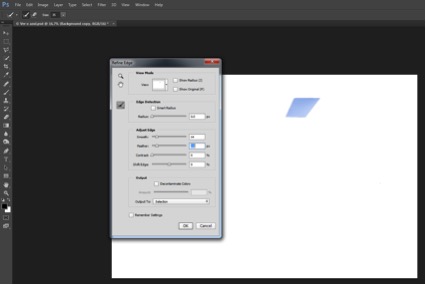
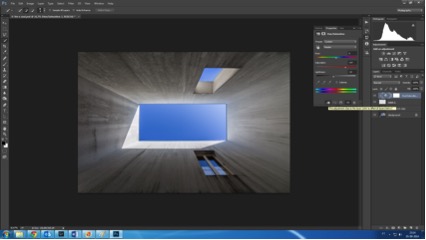
8) The blue in the window was very light compared to the blue in the skylight; I needed to darken it. I used the Quick Selection tool to make a selection of only the window.
9) To ensure a smooth transition between the layers, I clicked Refine Edge in the options bar and adjusted the Smooth and Feather settings.
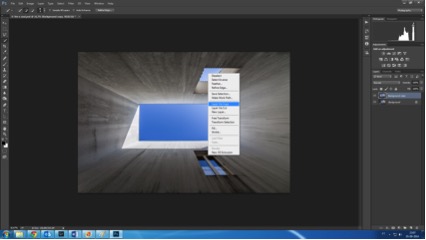
10) With the mouse hovering over the selection, I right-clicked to create a new layer of only the window by selecting Layer Via Copy in the drop-down menu.
11) To adjust the blue in the window, I applied a Hue/Saturation adjustment layer (Layer > New Adjustment Layer > Hue/Saturation) and then adjusted the settings until I was satisfied with the blue color.
12) I turned the Hue/Saturation adjustment layer into a clipping mask (Layer > Create Clipping Mask) so that it only affected the window area. This is the final result.
1) When you're shooting, concentrate and focus on the surroundings. Try to find different and innovative compositions by looking at your subject from all points of view. Try to look all around the entire space through the camera viewfinder. That way you will have a better sense of the different possibilities.
2) If the camera allows, always take photos in RAW format. When processing the image, much of the detailed information that may at first glance seem lost can most often be recovered.
3) While processing an image, always monitor the histogram to take advantage of the information that it provides. Unless it's intentional, never let the image contain pure white and pure black.
4) In post-processing, depending on the purpose and the message you want to convey in the image, consider altering the perspective to make the most simple and effective composition.
I was born in Porto, Portugal, on April 17, 1967. I graduated with a degree in electrical engineering, which is the area of my professional activities. Photography is a hobby that calls for a lot of passion and commitment. I have always considered it to be a way to perpetuate a moment, with all of the associated emotions, and as a way to share and disseminate what I have seen. In photography, I do not like to hold onto a particular style. I try to diversify my work, looking for simple compositions that convey meaning and aesthetic harmony.