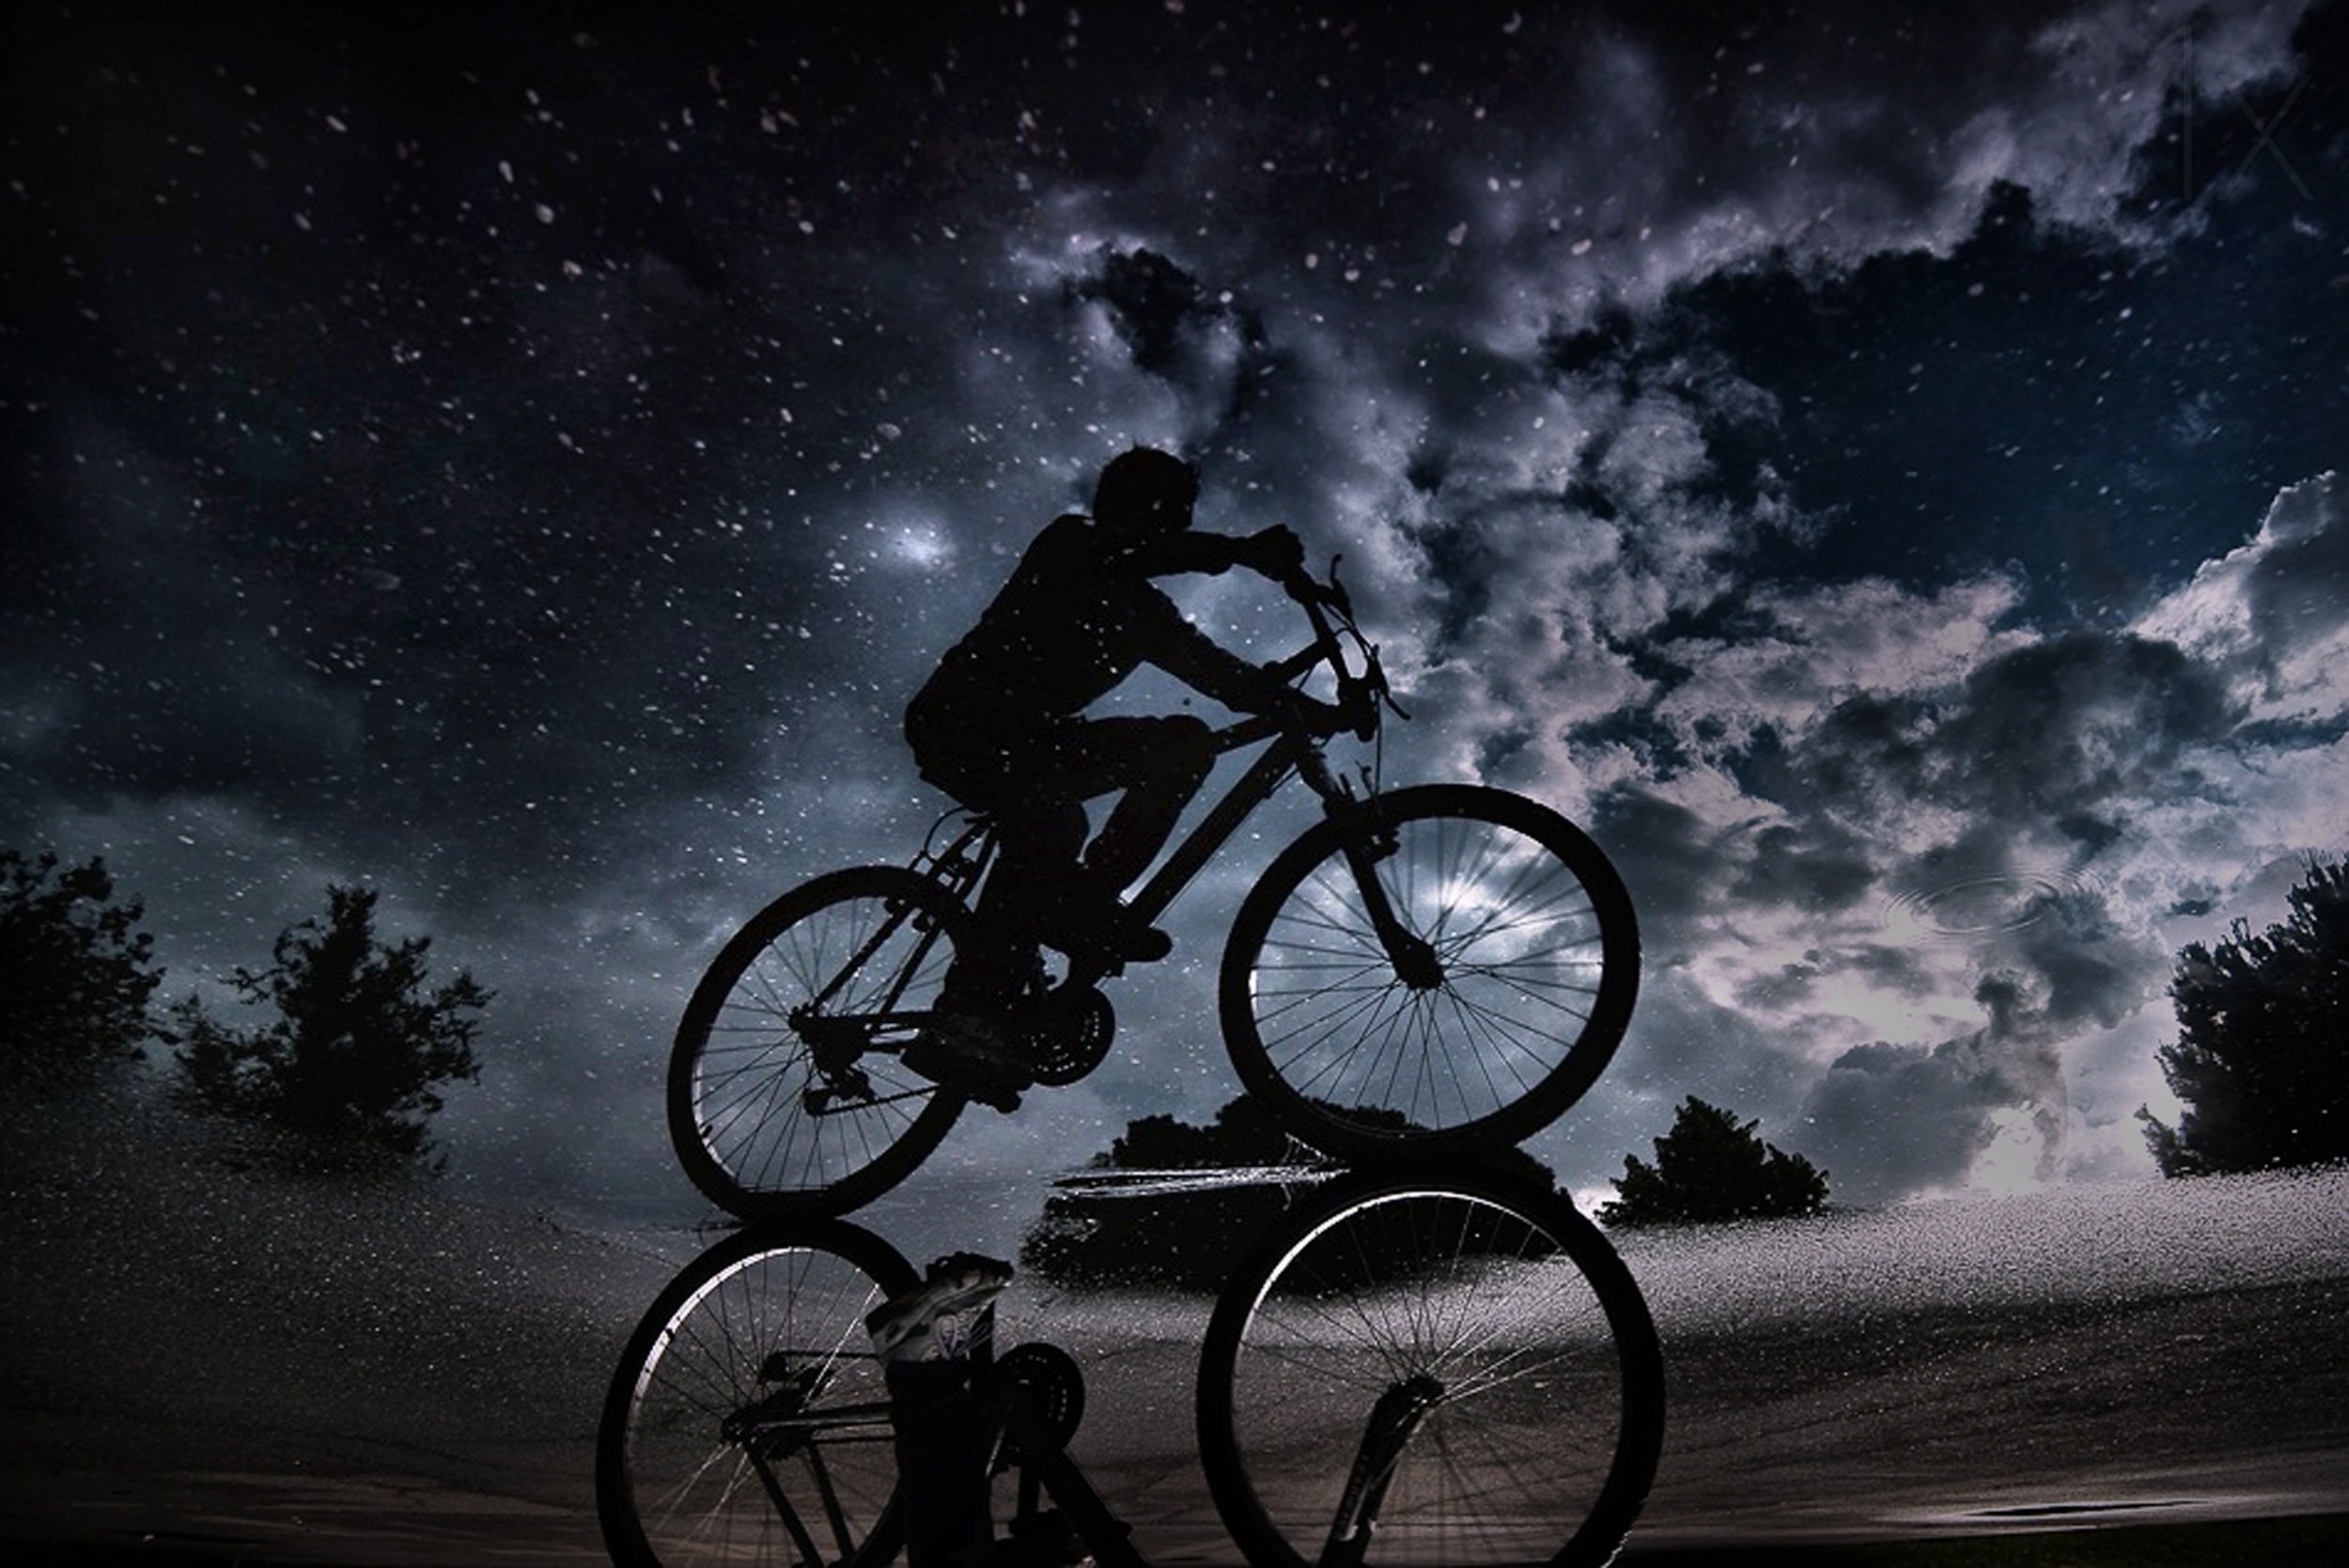
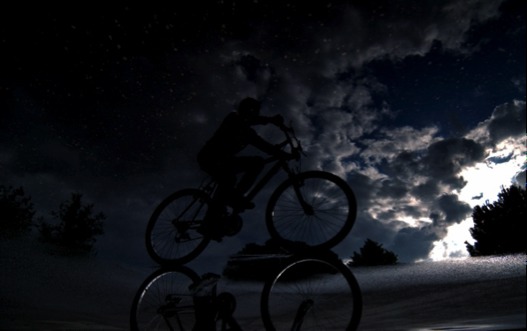
The photograph is a single shot. I had the idea for this shot because I have always been drawn to abstract forms created in reflections of water, especially when they are affected by the wind.
I spent almost the entire Sunday at home since it had been raining all day. When it finally stopped in the afternoon, I immediately went outside with my camera to a park near my home. I knew there would be fresh puddles there, and I wanted to take some photos of the reflections in them.
Nikon D300 . Tokina 12-24mm f/4 . F/5
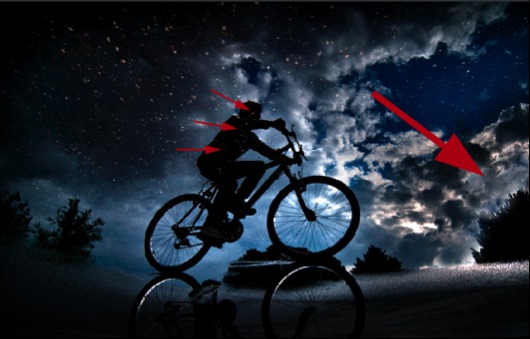
"It was the perfect location for my kind of photo, so I turned around with my camera and fired away as he peddled by."
The clouds eventually parted and the sunlight illuminated this puddle of water. Shortly afterward a boy showed up on his bicycle behind me, and his reflection appeared at the edge of the water. It was the perfect location for my kind of photo, so I turned around with my camera and fired away as he peddled by.My intention was to take a photo of a scene that occurs on a daily basis, yet it passes by completely unnoticed by most people — a scene in a simple pool of rainwater. I am very pleased with the reaction of those who have seen this image.
I used Adobe Bridge, Adobe Camera Raw, Photoshop CS4 and Nik Color Efex Pro 3.0 plugin to process this photo.1) I opened the image in Adobe Bridge. There I adjusted Exposure to –1.65, Recovery to 100 and Shadows to 3 and then exported the image to Photoshop.
2) I flipped the image horizontally and then cropped the photo to strengthen the composition.
3) I duplicated the image layer (Ctrl/Cmd+J), and I applied Nik Color Efex Pro 3.0 plugin with the following values:Filter: "BI-COLOR FILTERS"Opacity: 15%Blend: 100%Vertical Shift: 80%Rotation: 180°
4) Back in Photoshop, I added a Solid Color layer.
5) I set the layer's color value to 445666, and I changed the blending mode of the layer to Soft Light. In this way, I created an overall dark blue tone.
6) I then created a Levels adjustment layer and set the Highlights value to 91 to lighten the overall image.
7) I selected the Levels layer again, and using the key combination (Ctrl/Cmd+I), I inverted the fill color.
8) With a soft Brush set to 21% Opacity and 84% Flow, I slowly revealed the underlying layer of the brighter image until I liked the result.
9) At this point, I created a Brightness/Contrast adjustment layer and then decreased Brightness to –50 and increased Contrast to 35.
10) I repeated Step #8 with a soft Brush set to Opacity +21 and 84 Flow to reveal the layer below the Brightness/Contrast layer until I liked the result. I used the Clone Stamp tool to remove some eye-catching bright spots and a few small distractions on the boy's body.
11) I made a few more slight adjustments to the exposure, contrast and color saturation until I obtained the desired result.12) I prefer to sharpen the image at the end, and I do this in two stages as I decrease the file size. For this image I first applied the Unsharp Mask filter (Radius set to 50 pixels and Threshold set to 4 levels) and then reduced the Image Size by 50%. Afterward, I applied a second Unsharp Mask filter (Radius set to 30 and Threshold set to 2 levels), and I finished the process by reducing the image to meet the requirements for the web.
1) Make sure that you have good light, set the camera to spot metering and take a meter reading on the brightest part of the scene.
2) Use the autofocus and continuous mode, which allows you to follow a moving subject (cyclist, stroller, etc.).
3) Shoot 14-bit uncompressed NEF files (Nikon's RAW files) to have a greater chance of recovering information in post-production.
I live and work in Rome, Italy. My passion for photography has made me observe with interest the extraordinary and unique spectacle of nature along with the moments and multiple situations that occur every day. I hope, therefore, to be able to transmit and share through every single image the excitement that made me press the shutter button.