Canon Power Shot G10 . Canon 6.1-30.5mm . f/4
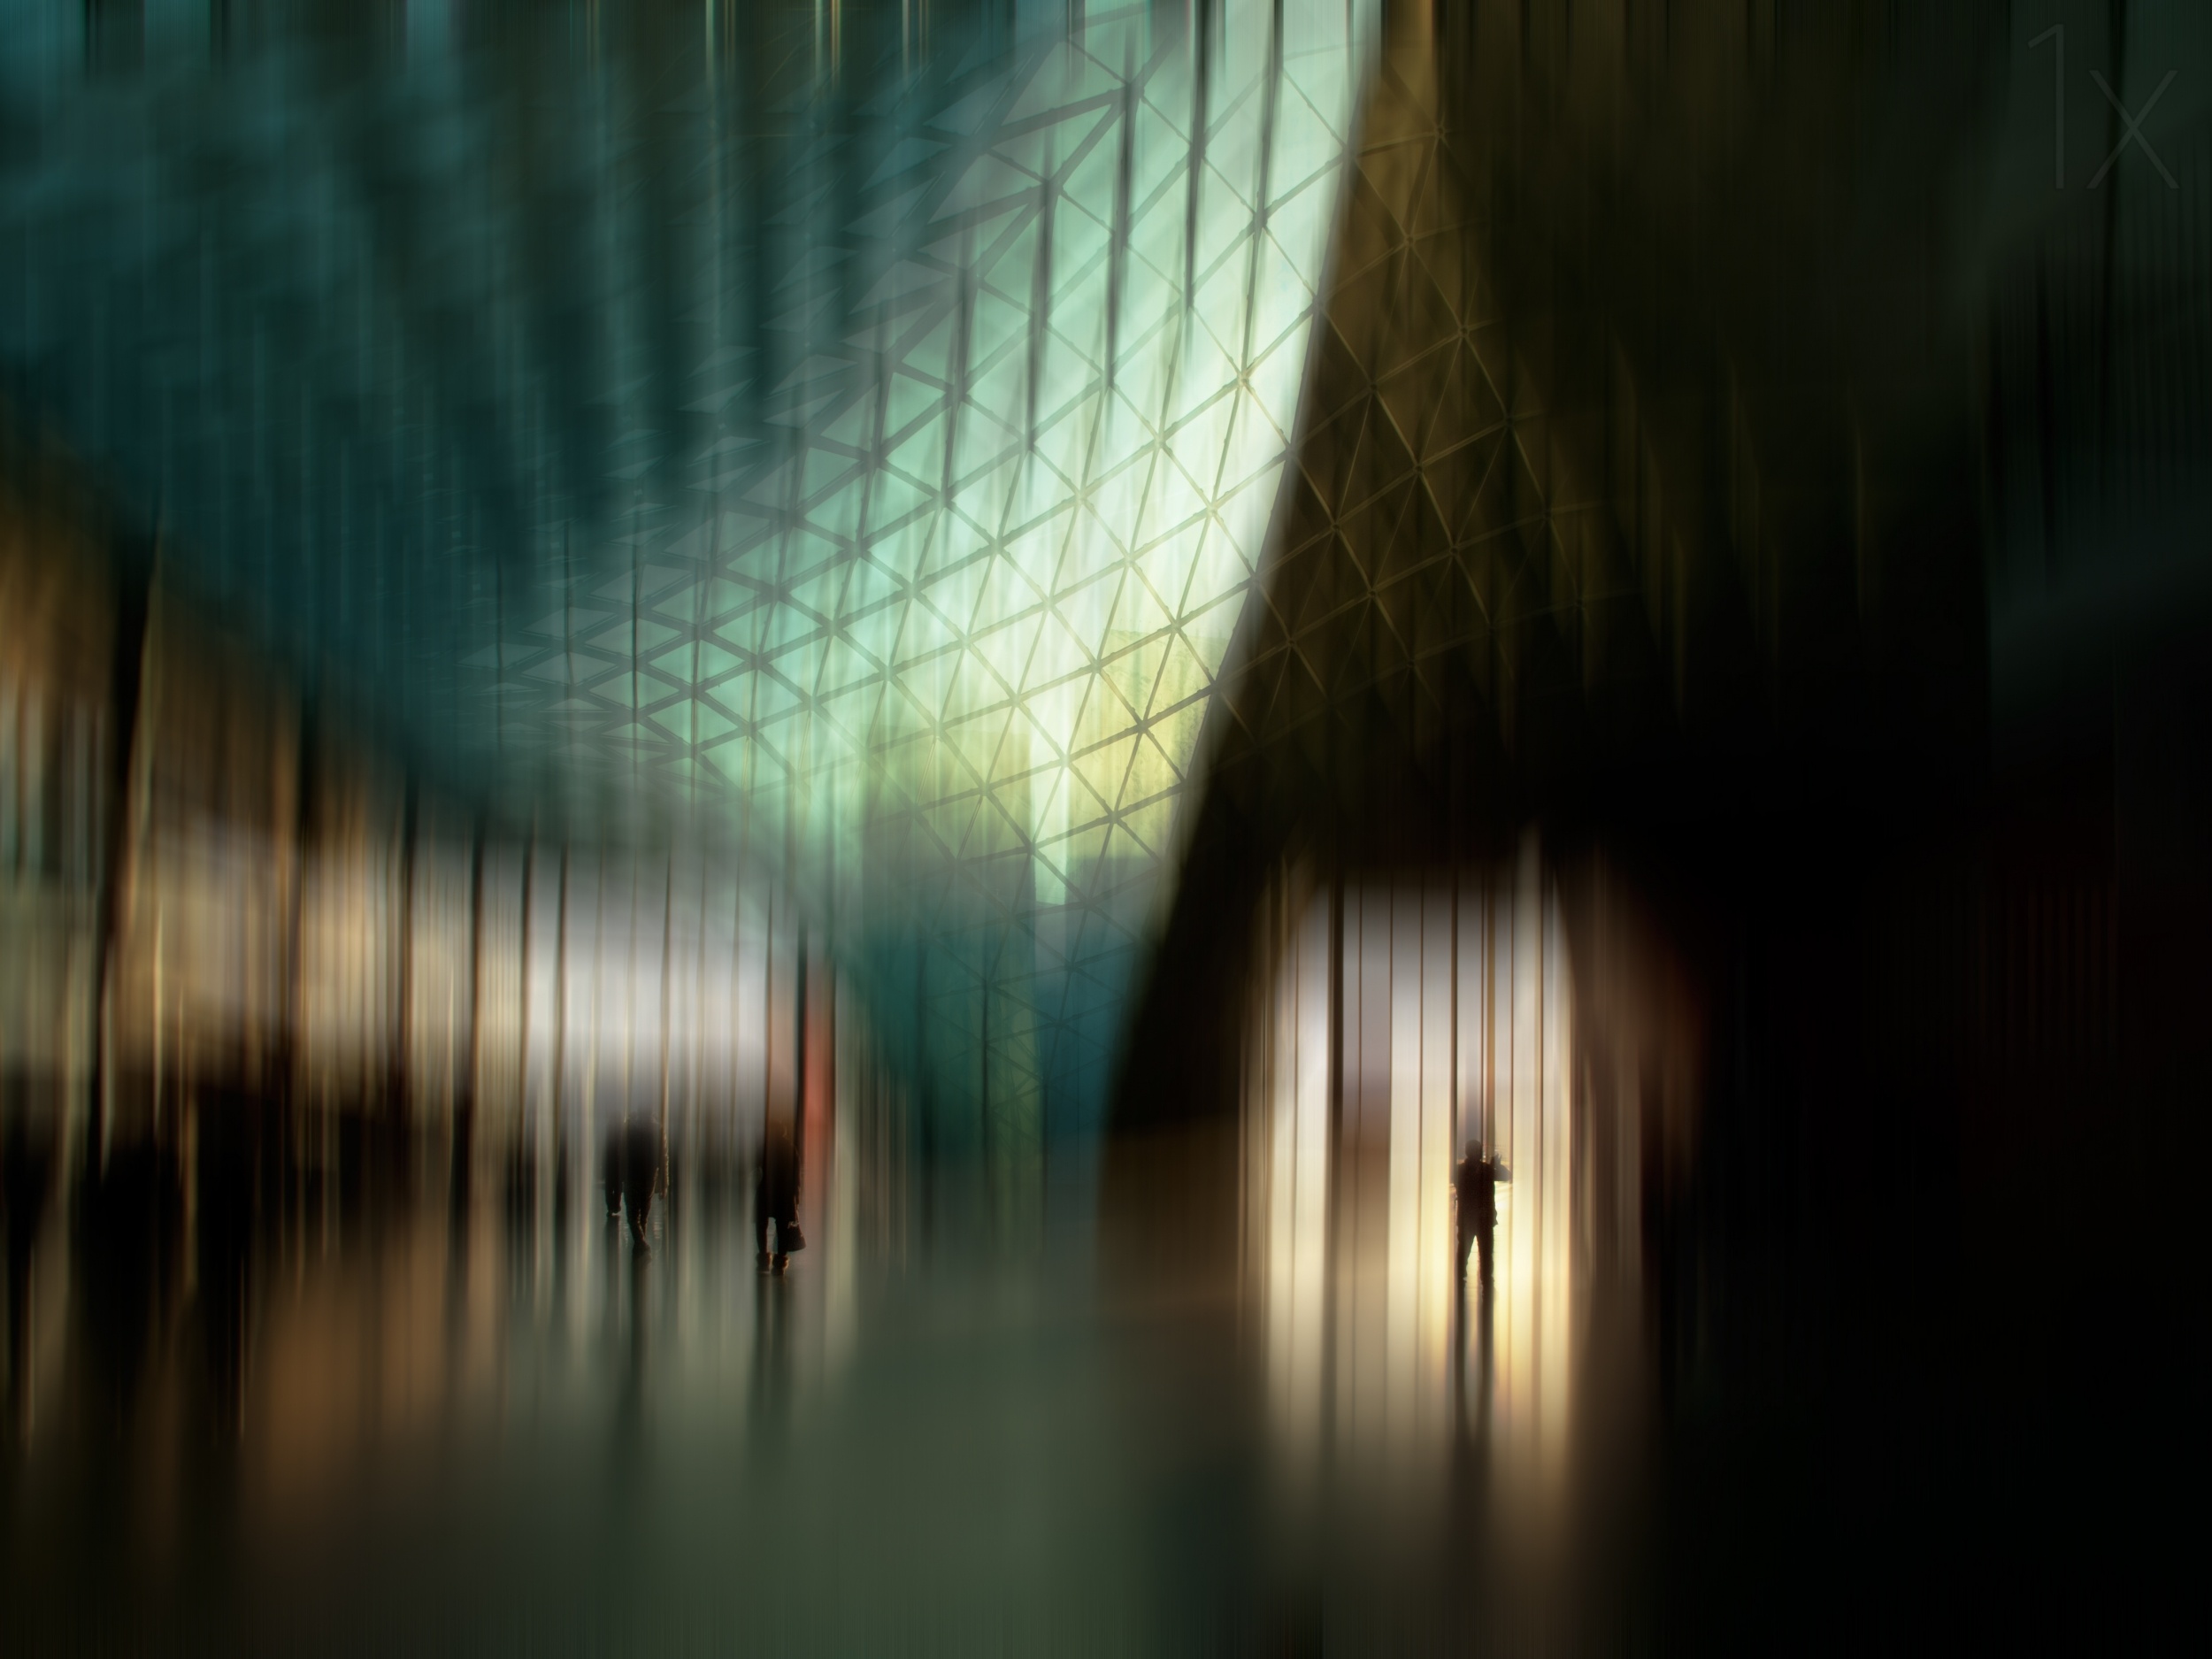
I had never photographed this complex, but its enormous size, unusual design and gridded glass and steel canopy intrigued me every year I attended The Artisan Fair in Milan. I knew it would be extremely crowded, so I intentionally brought a compact camera to move around easier. The time had come to finally capture this magnificent building.
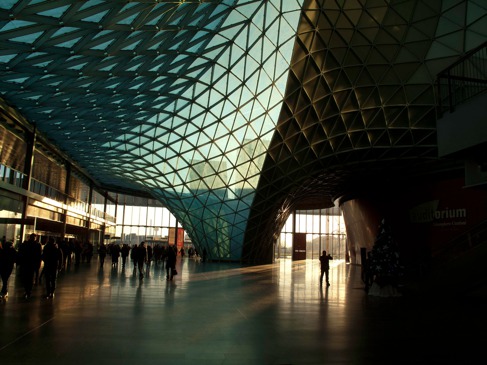
Every year during the first week of December in Milan, on the feast of St. Ambrose (the patron of the city), The Artisan Fair (L’Artigiano in Fiera) takes place. It’s a beautiful market that exhibits handicrafts from all around the world. The event is located on the Milan-Rho fairgrounds, and the building complex extends over half a mile (one kilometer) — it's one of the largest exhibition spaces in Europe. Designed by the famous architect Massimiliano Fuksas, it is covered by a wavy structure Fuksas calls the "Sail." It's an airy, transparent, netlike canopy made of glass and steel, which imitates the landscape of the snow-peaked Alps that can be seen in the distance. At some points the undulating structure exceeds 100 feet (30 m) and forms craters, waves, dunes and hills. It is quite an interesting photographic subject.
"My goal was to illustrate the overall airiness, transparency and vastness of space in the complex."
I’ve been visiting the fair for some years, and this time I decided to bring a camera with me. Since hundreds of thousands of people attend the fair, it is really difficult to walk around. So, in order to have more freedom of movement, I decided to bring along a compact camera (a Canon PowerShot G10) that allows me to shoot in RAW format. My goal was to illustrate the overall airiness, transparency and vastness of space in the complex.It was a beautiful sunny day with strong light, typical of winter mornings. Inside, the windows of the Sail allowed a soft light to filter into the complex, creating situations of very interesting chiaroscuro. I enjoyed the fair and took many pictures while visiting the exhibition halls that interest me the most: Tibet, Nepal, China, India, Africa and then Sardinia, Sicily, Campania and Tuscany.
"As the people roamed around without an apparent destination in the penumbra of the hall, the large windows at the entrance emphasized their silhouettes."
The photo I liked most was taken at one of the entrances under a huge crater of glass and steel. The atmosphere was remarkable, almost surreal. As the people roamed around without an apparent destination in the penumbra of the hall, the large windows at the entrance emphasized their silhouettes. I stopped to capture several images, waiting for an interesting situation. The highlight was the central crater of gridded glass and steel, illuminated by a green-blue light, that emerged from the floor and stretched toward the ceiling, dividing the scene into two parts. This situation presented itself when two people arrived on the right side and stopped to take a picture under a Christmas tree, while on the left side, a group of people advanced slowly, giving a formal and aesthetically pleasing balance to the scene.
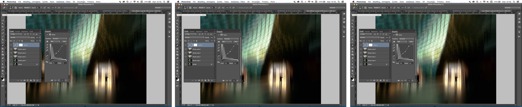
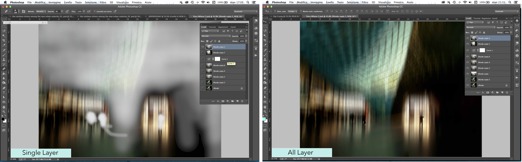
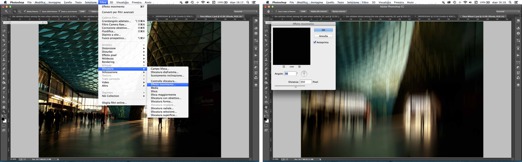
I used Lightroom to view and analyze the images. Once I made my selection, I exported it to Photoshop.This is the original image.
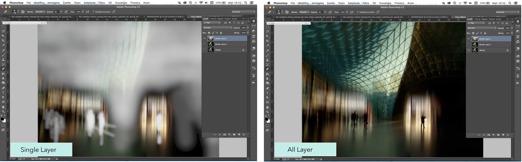
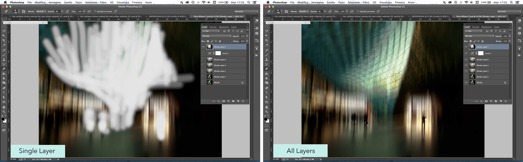
1) In Photoshop, I decided to first apply the Motion Blur filter (Filter > Blur > Motion Blur). It allowed me to hide the uninteresting parts of the image and to highlight the strengths of the image — the central gridded structure and the figures on the left and right sides of the frame. The central structure was the main feature, and the people were secondary. So I decided that the blur should start from the bottom-left of the frame, leaving just enough shape in the shadows to give an impression of the human figures there. I wanted to make sure that the group of people in the center was highlighted a bit, but I was most interested in leading the viewer's eye to the figure holding the bag and to the isolated person on the right. I made a copy of the background layer and applied the Motion Blur filter with Angle set to 90 degrees and Distance set to 350 pixels.
1) When you are photographing architecture, always identify the strengths and try different viewpoints while you are shooting.
2) Use different lenses: a wide-angle to enhance the perspective and to capture a wider scene, and a telephoto to isolate and highlight interesting details.
3) It's important to pay attention to the lines and to control them in the camera as much as possible. Whether they are parallel or orthogonal lines, they must always be perfectly symmetrical or strong diagonals to create overall balance in the image.
4) Always look for the play of colors, light and shadows; oftentimes they can become the main elements that make the photo unique.
5) Include human figures to characterize a space.
My first encounter with photography was at the age of 13 when a talented teacher introduced use to film development and printing. I was immediately intrigued by the images that magically materialized in chemicals in the darkroom. I came across photography while I was earning a master's degree in Applied Arts, Architecture and Furniture Design.
My first real encounter with photography, though, was in 1980 when I moved to Naples to study sculpture at the Academy of Fine Arts, and I discovered the work of Mimmo Jodice, who taught photography at the Academy at that time. I was struck, and ever since photography has stayed with me. In the same year my brother gave me his first camera, a Canon AV-1, with which I made my first steps in this fascinating and mysterious world. I still treasure that relic.
My dreams stopped on the evening of November 23, 1980, at 7:34 p.m. A devastating earthquake wiped out several areas in the Campanian Apennines mountain range. My village was razed to the ground and 86 people died out of about 500 inhabitants; five of them were relatives of mine. I interrupted my studies and returned to the village. We had so much need of affection in those terrible days, and I found it in a Swiss girl. She came to southern Italy with the idea of staying for just a short time to help the people so severely affected by the earthquake. She remained there for nearly two years. In November 1982 we moved to Switzerland, near Basel, and shortly after we got married. In 1985, Piera was born.
Meanwhile, the passion for photography grew more and more. I liked all kinds of photography — portraits, reportage, landscapes and macros — and I had a tendency to gravitate toward experimentation and creativity. So I started to develop and print my photos and to use a Polaroid camera, which allowed me a certain freedom of expression.
The turning point came when we moved to Ticino, 56 km from Milan. I was then able to fulfill my life's dream: to attend a professional school of photography. So I took a three-year hiatus from work, and I completed my studies at the Italian Institute of Photography. We spent a great amount of time in the studio shooting still life, fashion and portraits, using professional equipment ranging from 35mm to 10x12 large format cameras, optical benches and studio lighting. It was a wonderful experience that allowed me to really learn photographic techniques, and at the same time to study all the great photographers throughout history. Among the many courses and workshops there, I specifically remember one that was taught by René Burri, from the Magnum agency. He was a tremendously accomplished and experienced photographer and a person full of character and compassion.
Just as many other photographers, I have experienced firsthand the historical transition from analog to digital. I have a great curiosity and interest in these new technologies, and I enjoy the freedom of expression that they provide.
I am working as a CAD designer for a well-known shoe company in Switzerland. In my leisure time, which sadly never seems to be long enough, I devote myself to my great passions: photography and the mountains.